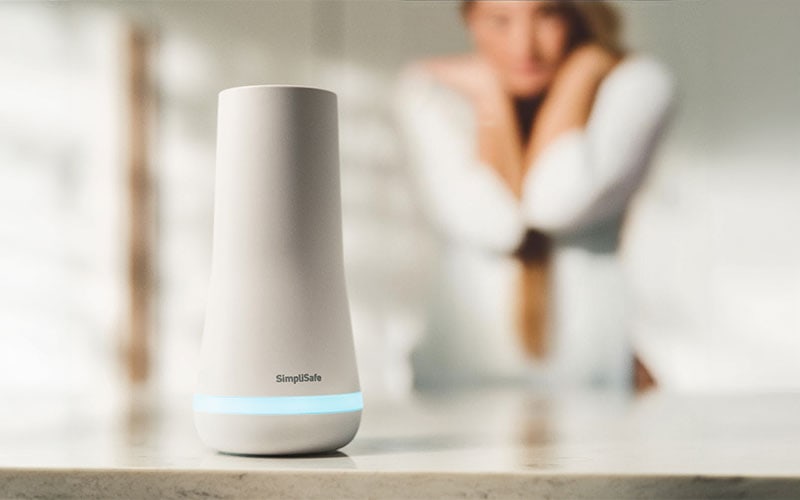
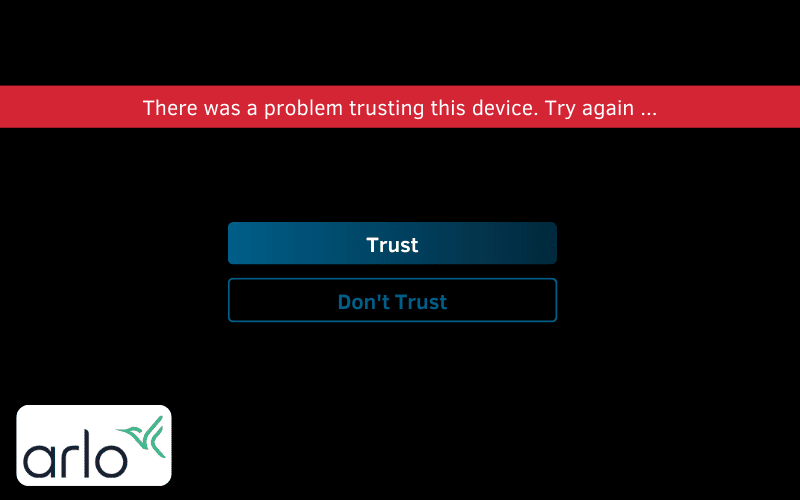
If you open up your phone and discover that Arlo is not trusting your device, then that might set alarm bells ringing. The last thing you want is to be unable to access your security device.
You will find that Arlo is not trusting your device because the data linking your smartphone to the app has been removed or corrupted and must be re-added.
Ensuring that your smartphone is a trusted device makes it much easier to access and monitor your Arlo security devices. It gives you the ability to control everything wherever you might be. So what can you do?
What Is a Trusted Device on Arlo App?
With Arlo products, a trusted device is any platform where you can safely access and use the full suite of settings and controls on the Arlo App.
This gives you the full ability to use and control whatever Arlo platforms that are monitoring your home. All of these devices are controlled centrally on your account and can be managed from both the app itself and your account profile on the desktop site.
Trusted devices are almost always linked to mobile devices such as smartphones and tablets, giving users greater flexibility of where they can access and use the Arlo platform.
Why Is Arlo Not Trusting My Device?
If the Arlo app is not trusting your device, then there could be several reasons for this. Some of the reasons include:
- The app has been reinstalled onto the phone
- You are using the app for the first time on a device
- The memory of the app was cleared
- The app had not been accessed for a long time
- It had been removed to make room for new devices
Whenever this issue seems to arise, it is best to check the Arlo Privacy Center within the settings menu to see what devices are listed as trusted devices.
From here, you can identify if your device is classified within the field and decide what to do next. This includes re-adding your phone as a trusted device or reinstalling the app itself and starting everything from scratch.
Why Is My Arlo App Not Trusting My iPhone?
Although the Arlo App has worked seamlessly with Android devices, it has had some issues connecting to new iOS devices such as the iPad and iPhone.
Whilst no particular cause for the issue has been revealed, any issues are usually patched quickly, and the app can trust iPhones once it has been updated.
How to update Arlo on iOS
There are two ways to search for an update for the Arlo app on your iPhone.
Through The App Store:
- Press and Hold App Store icon
- Select Updates
- Pull down and wait for the latest updates to refresh
- Click Update if the Arlo app appears on the list
Through Arlo
- Log onto your account on Arlo.com
- Click on Settings and select My Devices
- Choose your intended device and click on it.
- Click on Device Info and select Firmware
- Click on Update to manually update the app
By doing this, it should receive all the latest patches and help avoid any connection or trust issues between your iPhone and the Arlo app.
How do I get Arlo to Trust My Device?
The easiest way to get Arlo to trust the devices you use often is by adding it as a “trusted device” to your account.
Once a device is added, you will then be able to have full control of your Arlo products from that one device.
Setting up a trusted device is easy to do in just a few quick steps. All you have to do is:
- Open the Arlo App
- Tap on the User icon
- Select Account Profile & Security
- Select Two-Step Verification
- Choose the verification methods (usually email and SMS)
- Enter the codes sent to both your email and phone
- Click on the push notification which appears to prove it is you
- Tap the + icon once logged in to confirm this is a trusted device
This is the easiest method to add a trusted device via the mobile app. However, it can also be done from a desktop setting. To do this, simply:
- Log in on arlo.com
- Choose Settings
- Click on Account Profile & Security
- Complete the verification process
How to Verify a Device Without Two-Step Authentication
Occasionally, there will be times when the two-step authentication process might not work when adding a trusted device.
If this happens, you can still add a new trusted device without needing to use two different methods. To do this:
- Select Try Another Verification Method
- Pick what verification method you look to choose – email or SMS
- Enter the code in the App sent to your chosen contact info
Once you have entered this code, this gives you the ability to set trusted devices just like you would if you had two-step verification activated.
It’s a method that works both when setting things up on a mobile device or if using the desktop platform.
How Many Trusted Devices Can You Have On Arlo?
Most households often want to have access to their security camera on multiple devices. This lets adults in the family keep an eye on things and react depending on whoever is closest.
Thankfully, families can do this within their Arlo suite as a maximum of five devices can be added to the Arlo Privacy Center as a trusted device.
This means that you can have multiple smartphones and tablets set up with the Arlo app to give multiple people in your home the chance to view and react to anything picked up by your Arlo products.
How Do I Remove a Previously Trusted Device?
Over time, you will find yourself needing to cycle which devices you have listed as a trusted device with your Arlo account.
This could be because you have already filled the number of trusted devices assigned to your account or you are replacing older smartphones or tablets with a newer upgrade.
Thankfully, removing a device is relatively straightforward and only affects the device you have chosen to de-sync from your account.
Removing Trusted Devices on Android:
- Open the Arlo App
- Select Settings and click on Profile
- Choose Login Settings and click on Two-Step Verification
- Pick the device you want to remove, click on Edit, and then select Delete
Removing Trusted Devices on iOS:
- Open the Arlo App
- Click Settings and select Profile
- Open Login Settings and choose Two-Step Verification
- Pick the device you want to remove, click on Edit
- Swipe left to remove your preferred device
It’s important to remember that once a device has been deselected from being a trusted device, you will no longer be able to log in to the Arlo app automatically.
If you did want to re-use the Arlo app on that device, you would need to re-sync and re-verify the device like you did when you first added it to that particular platform.
Conclusion
As you can see, it is important to establish your trusted device on Arlo to ensure that you can access everything that your cameras pick up.
If your smartphone or tablet isn’t seen as a trusted device, make sure you log in and complete the two-step verification process to ensure that the device is recognized.
Should this fail, you can always pick one particular verification method to showcase that it is you accessing your Arlo account.
Should you still have issues, you can always update the app to ensure that any patches can help eliminate any bugs preventing access.
You can also remove trusted devices from your Arlo account when necessary to let you add new devices whenever you get a new phone or tablet.
So, no matter if you have an Android or iOS device, you can always find a way to access Arlo and never be left locked out, even if Arlo isn’t trusting your device.
Sources
About Author
Hey! I'm Dennis M. Peterson, a tech nerd, a master of code, adept at handling gadgets, and up-to-date with the latest tech trends. I deeply understand of how tech works and what to troubleshoot when issues arise. I hope you've found what you were searching for!
Read more about Dennis