Need help with your Ring camera? We understand that tech troubles can be frustrating, especially if you’re not a tech whiz.
Plus, the internet doesn’t offer a lot of helpful solutions sometimes. This article has simple solutions to typical Ring camera issues lined up just for you.
So, without further delay, let’s solve some of these issues.

- 1. Ring Camera Won’t Turn On
- 2. Ring Camera Won’t Reconnect
- 3. Ring Camera Won’t Send Notifications
- 4. Ring Camera Not Working After Power Outage
- 5. Ring Camera Has Red or Pink Tint
- 6. Green Light on Ring Camera
- 7. Ring Camera Won’t Connect to EERO
- 8. Ring Camera High-Pitched Noise
- 9. Ring Camera Not Detecting Cars
- 10. Ring Camera Beeping
- 11. Ring Camera Not Recognizing Solar Panel
- 12. Why Doesn’t My Ring Camera Work at Night (Without Light)?
- 13. Why Doesn’t My Ring Camera Record at Night?
- 14. Why Doesn’t My Ring Camera Notify Me?
- Summary
- Sources
You may also like:
- Ring Doorbell Common Questions
- Ring Contact Sensor Known Problems
- Ring Motion Sensor Known Problems (Solved)
1. Ring Camera Won’t Turn On
If you’re having trouble turning on your Ring camera, several things could be the issue.
The first thing to do is to ensure your camera is plugged in, especially the wired cameras.
If your camera is plugged in and still wouldn’t turn on, check to make sure you’ve plugged the camera into a working outlet.
If you’ve confirmed that the camera is plugged into a working outlet and it still wouldn’t turn on, below are a few tricks that might help fix the issue:
- Unplug and replug it.
- Ensure the micro-USB cord (or whatever charging cable is used) is securely connected to the camera’s port.
- Press the reset button on the camera or use the reboot feature in the Ring app if the camera is out of reach.
If that still doesn’t work, then the issue with your camera is probably an issue with the battery.
In that case, there are a few things you can try.
These are also effective if you own a battery-powered camera.
- Remove the battery from your camera and charge it for a few minutes before reinserting it.
- Hold the reset or setup button for about 20 seconds to factory reset the device.
If that still won’t work, try fully charging the battery first, before putting the device in setup mode again.
2. Ring Camera Won’t Reconnect
If your Ring camera is having trouble connecting, don’t worry! The Ring app will display an error code to help you figure out the issue.
When facing these issues, we recommend you check your Wi-Fi settings first.
It’s possible you have a strong Wi-Fi connection, and your camera still has trouble reconnecting. A possible reason for this is that your Wi-Fi network is set at 5 GHz.
Typically, most Ring products require a 2.4 GHz connection, so if your camera is one of these devices, a 5 GHz connection wouldn’t do you any good.
Check to see if your Wi-Fi is set to 5 GHz, and if so, change it to 2.4 GHz to see if that makes a difference.
Here are some other common reasons your Ring camera might have trouble reconnecting:
- You are trying to connect to the wrong Wi-Fi.
- Your Wi-Fi name or password has been changed.
- Your Ring device could be too far from your Wi-Fi router.
- Your mobile device might be experiencing a weak signal or a problematic connection.
- Your home Wi-Fi might not be performing well, or your internet provider is facing high levels of network traffic.
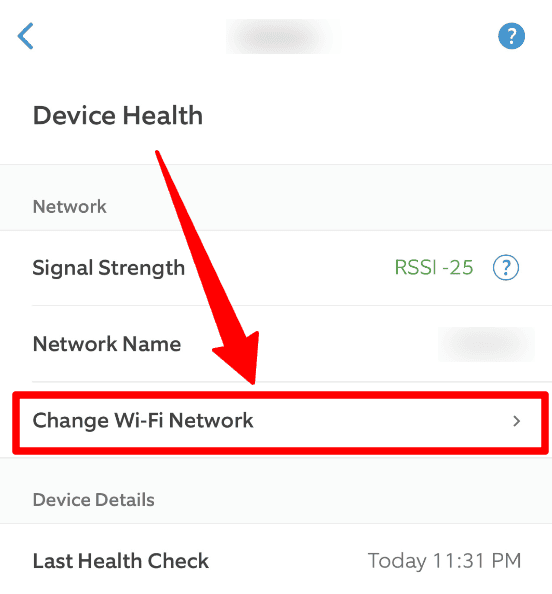
To improve your connection, first check your Ring device’s signal strength. Watch out for the colors green and red. Green means you have a strong connection, while red indicates a weak one.
To reconnect your Ring security camera to your Wi-Fi network, follow these simple steps:
- Launch the Ring app.
- Click on the menu symbol (≡).
- Choose “Devices” and select the Ring camera you wish to reconnect to Wi-Fi.
- Tap the “Device Health” section.
- Under “Network,” select “Change Network,” then follow the instructions provided within the app.
Give your device some time to fully reconnect to the network, and then check the Wi-Fi signal strength in “Device Health” to confirm a successful reconnection.
If the Ring camera that wouldn’t reconnect to Wi-Fi is a floodlight camera, it’s possible the camera isn’t properly connected to a light switch or a timer or the switch isn’t on.
If that’s the case, the camera may run out of power, thereby disconnecting from your Wi-Fi.
To reconnect the floodlight cam, make sure the device is connected to a switch that’s turned on or a working timer so the floodlight cam can remain adequately powered.
3. Ring Camera Won’t Send Notifications
If you’re having trouble with Ring notifications on Android or iOS, follow these simple steps:
For Android:
- Clear Previous Notifications: Some Android devices limit notifications per app, so clear old ones.
- Check Notification Settings:
- Go to your Android settings.
- Find “Apps” or “Applications.”
- Select the Ring app.
- Make sure “Allow Sound and Vibration” is on (not set to “Deliver Quietly“).
- Navigate to “Notification Categories” and turn on notifications for all devices.
For iOS:
- Restart your iOS device.
- Ensure “Do Not Disturb” is off in the Control Center.
- Confirm Notifications and Online Status:
- Your device needs Wi-Fi for notifications.
- To check your Ring device:
- Go to the menu and tap “Devices.”
- Select the device.
- Make sure “Ring Alerts,” “Motion Detection,” and “Motion Alerts” are on.
- For Wi-Fi, check “Device Health” for your Signal Strength RSSI. If it’s red, tap the question mark for help.
You’d also want to check the camera’s Wi-Fi connection. Your Ring camera needs a working internet connection to send notifications to your mobile device. So, if your camera isn’t connected to a strong Wi-Fi connection, then you wouldn’t receive any notifications.
4. Ring Camera Not Working After Power Outage
Here are some easy fixes you can try:
- Restart Your Router
- Turn off your camera.
- Restart your Wi-Fi router.
- Wait for 60 seconds.
- Turn your camera back on.
- Wait a minute or two to see if it reconnects on its own before doing anything else.
- Close the Ring App on your smartphone, turn off your smartphone, and then turn it back on. Press the reset button on your Ring Device.
- If the problem persists, Try a Factory Reset on your Ring device. Hold down the Setup button for 20 seconds, and it will start a setup process. Complete the setup again.
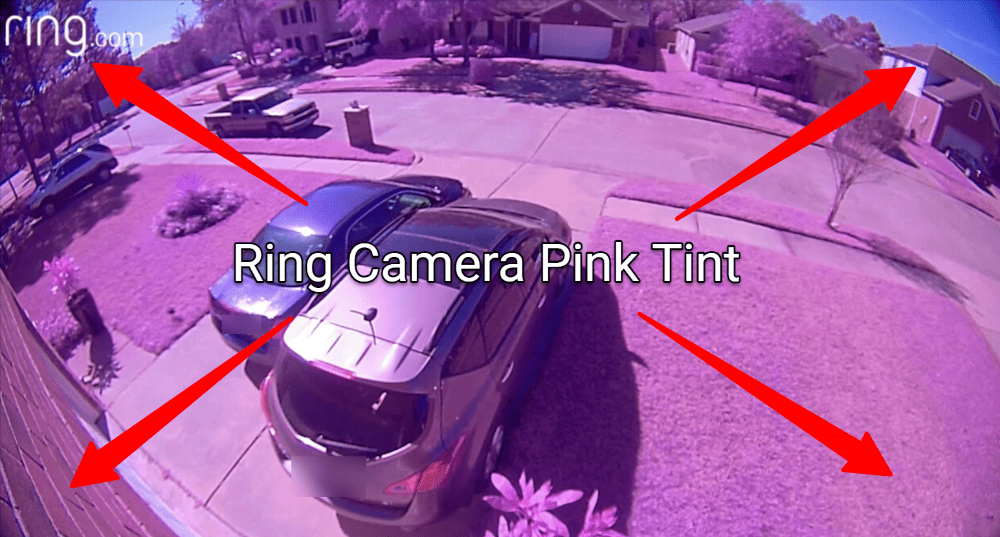
5. Ring Camera Has Red or Pink Tint
If your camera shows a weird color in Live View, it might be because of the IR filter. Try shining a bright light into the camera during Live View to see if it fixes it.
If that doesn’t work, do this:
- Press and hold the setup button on your device for 20 seconds to reset it.
- Then, in the Ring app, go to Main Menu > Devices > Choose the device > Device Health > Change or Reconnect to Wifi.
- Follow the next setup steps it shows. Once it’s set up, check the Live View to see if the issue is fixed.
It is essential to know that sometimes, this is a hardware issue.
Factors like direct sunlight, extremely high or low temperatures, or rainfall could cause some damage to the camera, causing effects like this.
Other sorts of damage to the camera, as well as the age of the camera itself, could also cause such an issue.
In cases like this, fixing the issue can happen due to anything from a slight tap on the camera to a drop or rise in temperature.
In cases like this, we recommend getting the camera to a Ring professional for a physical examination of the device.
6. Green Light on Ring Camera
During the initial setup, your camera’s green light will turn off once it successfully connects to your Wi-Fi network.
If you see a flashing green light, the camera is in setup mode, attempting to connect to Wi-Fi or an available Wi-Fi network.
However, if there’s no green light during quick setup, it indicates that the camera is not in its initial setup mode, so you can proceed directly to the next step without waiting for the green light.
7. Ring Camera Won’t Connect to EERO
If you’re having trouble with your gateway eero or modem during setup:
- Ensure the gateway eero is connected to the modem using the provided Ethernet cord. It should fit snugly into both the eero and one of the Ethernet ports on the modem.
- Try turning off your modem. If it has a switch, turn it off and wait for 30 seconds before turning it back on. If there’s no switch, unplug the modem, wait for 30 seconds, and then plug it back in. Wait for the modem lights to stabilize.
- Also, try turning off your gateway eero by unplugging it and then plugging it back in. Wait about 2 minutes for it to restart.
These steps can help with connection issues during setup.
Another thing you can check is if you’re using any special characters in the SSID (WiFi name) or password of your eero.
Some people have reported that something as seemingly harmless as a space “ “ in their password caused issues that otherwise resolved themselves once they tried using only alphanumeric characters for both SSID and password.

So, skip the strange characters and symbols (and yes, that includes emojis) and pick a strong password using only standard letters and numbers.
8. Ring Camera High-Pitched Noise
A high-pitched noise is an issue more commonly observed on the Ring floodlight camera.
If you ever experience this issue with your floodlight camera, below are a few things to try out.
First, try a soft reset by pressing the Reset Button at the top of the floodlight camera. The reset should normally reboot the camera and fix the issue.
If that still doesn’t fix the problem, do a hard “Factory Reset” by holding the same setup/reset button for about 30 seconds.
When the hard reset is complete, the LED indicator at the bottom of the camera should flash a few times, indicating that the camera is restarting. The process might take a minute or longer to complete.
Once the hard reset is complete, put the floodlight cam on Setup Mode to start setting up your camera again. Do this by single-pressing the reset button.
Once your setup is complete, you should no longer experience this issue.
If, after resetting your floodlight camera, this problem shows up again, we recommend you get in touch with customer support, as there is likely some hardware issue with your device.
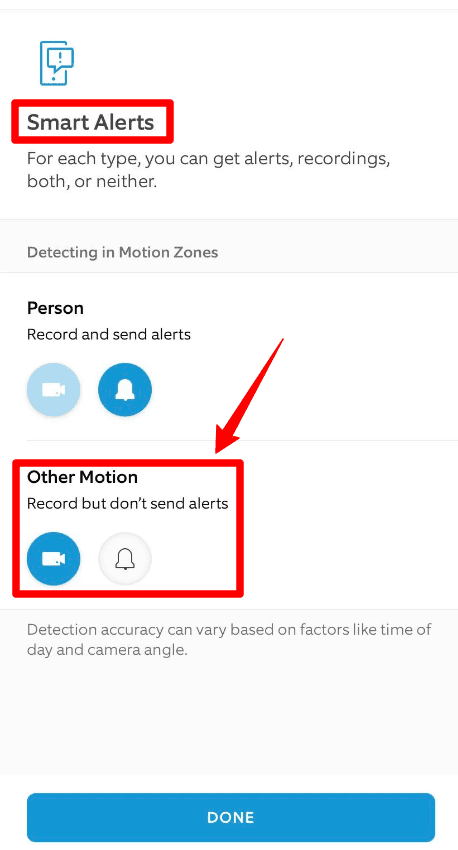
9. Ring Camera Not Detecting Cars
Try going to your Motion Settings and tweaking a few things. First, you can increase the Motion Sensitivity to the highest level.
Then, take another look at your Motion Zones and make adjustments if needed.
If you have Smart Alerts turned on, make sure you also have “Other Motion” enabled so that it records and alerts you for all types of motion.
10. Ring Camera Beeping
A beeping noise is a Ring camera problem typical of Ring Stick Up Cams. Thankfully, resetting the camera fixes this problem.
To reset your Ring Stick Up Camera, follow the steps below depending on which type of Sick Up Cam you own:
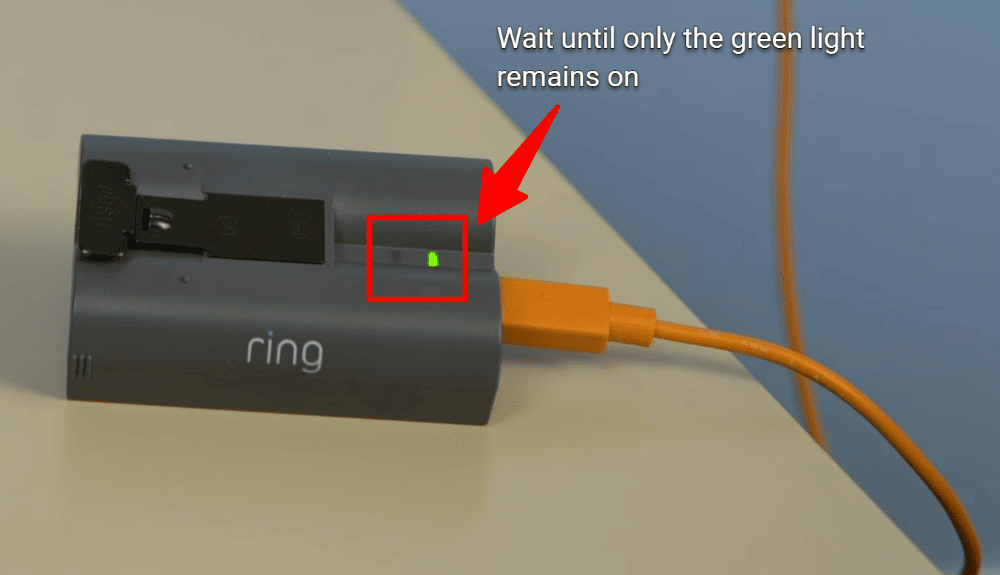
Ring Stick Up Cam (1st Generation)
- Lift the small cover on the back of the camera. You should find an orange button under it: the reset button.
- Press and hold this button for 20 seconds when the camera’s LED indicator flashes for a few minutes.
- Wait until the LED indicator turns off, indicating the reset is successful.
Ring Stick Up Cam Battery (2nd Generation)
- Remove the camera’s battery cover.
- Locate the orange setup button near the battery slot. Press and hold it for 10 seconds until the LED indicator starts flashing for several minutes
- Wait until the LED indicator turns off, indicating the reset has been successfully completed.
Ring Stick Up Cam Battery (3rd Generation), Ring Stick Up Cam Plug-In, and Ring Stick Up Cam Pro
- Remove the camera’s battery cover.
- Locate the orange setup button near the battery slot. Press and hold it for 10 seconds until the camera enters setup mode.
After the reset, set up your camera in the Ring app using the “Set Up a Device” steps.
Once the new setup is finished, observe your camera to see if it still makes beeping noises. If the issues persist, then you may need to contact customer support.
11. Ring Camera Not Recognizing Solar Panel
If your camera isn’t recognizing your solar panel, follow these steps to fix it:
- Remove the camera from your account.
- Hold the setup button on the top for 20 seconds. Wait for blue and white lights to flash, which might take a few seconds.
- Open the camera’s bottom and remove the battery(s). Wait for 10 seconds, then put the battery(s) back in. Leave the battery compartment open because you’ll need to scan a QR code during setup.
- Open the app, tap “Devices,” and select “Add Device.”
- Choose the “Solar” version of your device. For example, if you have a spotlight cam, choose “Spotlight Cam SOLAR” from the list.
- After scanning the QR code, close the battery compartment.
- Complete the setup process. The camera will update its firmware (this may take 5-15 minutes, depending on your network speed). In “Settings > Device Health,” you’ll see the solar panel connected and charging the device.
Ensure your battery(s) are fully charged before starting this process. This issue happens when you add the solar panel later, causing the device to have the wrong firmware.
If you have any other questions about your Ring Solar Panel, check out our helpful Ring Solar Panel FAQ.
12. Why Doesn’t My Ring Camera Work at Night (Without Light)?
There are a few reasons this might happen.
If your Ring Video Doorbell doesn’t respond or show any images, and everything else seems fine, the camera might be broken. You can replace the camera or otherwise contact customer support for help.
Another possibility is poor wiring.
Night vision and video freezing problems can occur due to poor wiring.
Checking the wiring and ensuring the Pro Power Kit (if you have one) is installed correctly might be all you need to fix this issue.
Another possibility, though, is an issue with your camera’s night vision.
Since it’s impossible to turn off Ring camera’s night vision feature, it should always activate at night or in low light settings.
If this doesn’t happen, rebooting your camera (or doorbell) should help fix the issue.
Ro reboot your device,
- Open the Ring app.
- Tap the menu icon.
- Tap Devices.
- Select the Doorbell or Camera with the night vision issue.
- Tap on the Device Health tile.
- Scroll down to Reboot This Device and tap it.
- Give your device a few moments to start back up.
Pro Tip: It is also possible your camera isn’t working at night because the device just isn’t connected to the internet or is experiencing weak signal strength.
If this is the case, then your device will experience video issues regardless if it is during the day or at night.
13. Why Doesn’t My Ring Camera Record at Night?
Your Ring security camera not recording at night might happen because of your camera’s night vision settings or not enough light.
Check the night vision settings in the Ring app and make sure there’s enough light around your camera for good nighttime recording.
14. Why Doesn’t My Ring Camera Notify Me?
To get alerts, follow these steps in your app settings:
- Find the “Show Notifications” box and check it to enable alerts.
- Make sure your app notifications are set to “Priority.”
- If “Show Notifications” was already checked but you’re not getting alerts, uncheck it, click “OK,” then recheck it.
- Clear the app’s cache in your settings.
- Test your device by pressing the doorbell button or triggering the motion sensors.
Summary
Dealing with Ring camera issues doesn’t have to be complicated. The solutions listed above can help you fix them easily.
However, if you encounter problems you cannot deal with, don’t hesitate to contact customer support for assistance.
Check out Do Ring Devices Work in Other Countries? and Ring Mailbox Sensor Known Problems Solved for more related content.
Sources
- Floodlight Cam Setup Mode, Ring Support
- How to completely reset your Ring Security Camera, Ring Support
- Refining Your Motion Alerts for People and Other Motions, Ring Support
About Author
I'm Maroun, the seasoned technology writer crafting compelling tutorials and posts since 2013. With over a decade of versatile experience spanning the IT, Security, and High-tech industries, my main qualities are adaptability and perfectionism. Join me in this journey, where every word is a masterpiece!
Read more about Maroun